`1959 Bel Air Two Door Sedan - Air-Ride, Tri-Power, 4-Wheel Disc, OCD Details.
- Price:
- Location: Tucson, Arizona, United States
- Condition: Used
- Make: Chevrolet
- Model: Bel Air/150/210
- Trim: 2-Door Post
- Year: 1959
- Mileage: 99,999
- VIN: C59L100803
- Engine size: Small Block 4-Bolt main V8 350 CID
- Transmission: T-350 Automatic
- Drive type: Rear Wheel
- Vehicle Title: Clear
1959 Chevrolet Bel Air/150/210 Description
There’s a lot of auction “description” content here, and at least some of it is likely unnecessary. Unless you’re serious about getting into a ’59 X-frame it’s probably not going to be a compelling read. (Also – Please be patient to download pictures).
If you know a little about ’59 Chevys, or if you actually wrench on these cars, however, you can appreciate the time, effort, and expense that went into this build, and the absolute insanity of trying to find the balance between “bullet-proof driver” and “trailer-only” show car. A lot of projects I see on e-bay are described as “nut and bolt” detailed, but very few cars budgeted to be daily drivers are actually taken apart (all the way apart) and re-assembled at that level. This is one of them – four years in the making and getting down to that stage where its time to finish it or find a competent new owner that can complete it with their own vision.
The concept was to take a ’59 two-door post, update all the mechanicals for reliability, and maintain the character, lines, and original attitude the factory intended. Many of the best cars you see driving around follow this ideal, the difference is that most of them are high budget builds that travel from shop to shop to have alleged experts customize each specialty drivetrain area - suspension, brakes, exhaust, etc. One guy’s work always ends up overlapped or interfering with another guy’s work, and by the time it’s all done no one can tell you how it all went together, how to take it apart, why it has the inevitable quirks, where components were sourced, or even where to find replacement parts. Everything bolted to the frame on this build was designed, sourced, fabricated, and installed by one (admittedly OCD-prone) guy in one warehouse and garage. Every step was documented, and the receipts, instruction manuals, part numbers, wiring guides, and warranties are all filed for reference.
BUILD DETAILS:
This project came to me as running, driving, recently painted, and sold on hardship. It had a late model Vortec small block under the hood and had new floor and trunk pans installed. Some of the fabrication work was good, some bad, and some really ugly. It didn’t have an interior beyond seats or any straight chrome, but it had a ton of potential.
FRAME / RUNNING GEAR: I started by sourcing a clean, straight, 1964 Impala station wagon frame as the foundation. Why? Because the ’59 frame had been welded and cut on when they installed the Vortec, and I’ve worked on X-frames for a decade. GM had all the running-gear bugs worked out by ’64, the suspension parts (especially for Impala) are readily available, and there are unlimited aftermarket options made for them. More importantly, the wagon frames are factory boxed in the rear in ’64. Fitting a 1959 body on a ‘64 frame only requires adding the ‘59 central body mounts and making provisions for the differences in bumper brackets. (The original 1959 Bel-Air frame is included with the auction). The ’64 wagon frame was completely disassembled, media blasted to bare metal, and sprayed with three coats of semi-gloss black enamel. A heavy gauge, 1” diameter steel tube reinforcement was welded across the rear shock tower support to supplement the factory cross-member. (I highly recommend adding this support for anyone considering air-ride suspension). The differential carrier, carrier bracket and upper and lower rear trailing arms were media blasted to bare metal, painted with three coats of semi-gloss black enamel, and reinstalled on the frame with PST (ENERGY SUSPENSION) bushings and grade-8 hardware. The front upper and lower A-Arms were media blasted to bare metal, spayed with three coats semi-gloss black enamel, and fitted with NOS MOOG upper and lower ball joints. The A-Arms were re-installed using PST bushings and grade-8 hardware. New disc brake rotors and calipers supplied by RIGHT STUFF were installed on the stock spindles over new wheel bearings, races, and seals. The engine frame mounts and transmission cross-member were media blasted to bare metal, painted with three coats semi-gloss black enamel and reinstalled with grade-8 hardware. A new center-link was installed using NOS MOOG inner and outer tie rods, a NOS MOOG pitman arm, and a NOS MOOG idler arm. Aluminum (T-6), internally threaded, tubular tie rod adjusters were also installed. All new and NOS parts were removed after trial fitment, painted with semi-gloss black enamel, and reinstalled. The adjustable panhard bar is from UMI PERFORMANCE. Wheels are vintage GM 15X7 Rallys with new P255 70R15 BFG T/A radials.
DIFFERENTIAL: The rear end was completely disassembled and the housing was media blasted to bare metal and painted with three coats semi-gloss black enamel. The carrier was cleaned and a new pinion seal installed. New heavy-duty axle bearing were pressed on the rear axles. NAPA sourced extra length wheel studs were installed on both axles to accept rear disc brake rotors. New slotted, drilled disc rotors and calipers from RIGHT STUFF were installed with stainless flex lines and grade-8 hardware.
ENGINE / TRANSMISSION: The performance 350 small block and turbo 350 transmission came from a running, driving, 1975 Chevrolet 1-Ton Van. It was handicapped equipped and had very low miles, showing only 24K actual on the odometer. The casting number indicated a four-bolt main block, and this was confirmed when the pan was replaced and the bottom end was inspected. All the factory tin was removed for new seals, and a new NAPA double roller timing gear set was installed, along with a new 8” performance balancer. Upgrades include an EDELBROCK Victor Series aluminum water pump, aluminum timing cover, and finned aluminum oil pan. Performance upgrades include an EDELBROCK aluminum tri-power manifold with matching Rochester 2G carbs prepared by Delbert at Tri-Power Specialists in Warrensburg Missouri. (These are not stock carbs, they are built with the correct throttle plates, primary pickup tubes and power valves for progressive throttle and tri-power induction – spare jets of smaller and larger stage are included for jetting changes required by higher or lower elevation), AIRTEX fuel pump, ACCEL Dual Point distributor, new ignition coil, and new plug wires. Air Filters are new K&N E-3120s, and a trio of shorter K&Ns are included (along with correct length carb central threaded rods) that will clear the hood. Spark plugs, gaskets, thermostat, fan belts, kick-down cable, PCV valve, oil pressure switch, temp warning switch, and hoses are all new. Valve covers are new EDELBROCK vintage style finned aluminum. Tri-power linkage was supplied by Tri-Power Specialists. Stainless fuel lines were all custom bent for fitment without having to use rubber hose, and installed with reusable brass fittings. Adjustable in-line fuel pressure regulator and viewable flow filter are new and installed on hardline. Alternator is new with lifetime warranty, and all engine brackets were custom fabricated for symmetry and hood clearance. The transmission was drained and flushed. A new torque converter was installed along with a high volume finned aluminum oil pan and matching aluminum flywheel cover. Transmission and motor mounts are new (ANCHOR 2142 and 2268). Driveshaft is custom built and balanced by SIMMONS, with shatter-proof carrier bearing A heavy spline slip yoke was incorporated into the rear section of the driveshaft to allow full travel of air-ride without stressing driveline. Radiator is new OEM Harrison style.
DUAL EXHAUST: Manifolds are TRU-RAM cast stainless steel headers with 2 ½” dump. The collector flanges are 3/8” stainless steel and port matched to maintain 2 ½” I.D. through the mufflers, which are MAGNA-FLOW stainless units. All the exhaust tubing is FLOWMASTER 409 stainless and mandrel bent to maintain 2 ½” I.D. until the tailpipe, which narrows to 2 ¼” for scavenge flow. A short section of mandrel tubing has been incorporated on each side in heavy gauge steel as a provision for adding exhaust cutouts. The exhaust clamps are stainless, severe duty style.
FUEL SYSTEM: OEM-correct stainless steel fuel tank, stainless straps, stainless sending unit and stainless fuel line from the front to the back of the car.
AIR RIDE: Four corner, independent air-suspension kit was supplied by RIDE-TECH with application-specific mounts for 1964 Impala, and installed with grade-8 hardware. Conversion uses dual needle gauges and four solenoid manifold. The tank, pump and manifold system has been installed under the baggage panel behind the front seats. RIDE-TECH RQ-Series shocks are installed at both front and rear.
BRAKES: Four wheel power disc conversion was performed using RIGHT STUFF conversion kit and incorporates dual master cylinder. Kit was upgraded to drilled and slotted rotors and 9” Booster. The brake lines from front to back are all stainless and held in place with stainless hardware, and the calipers at all four corners are equipped with stainless flex lines. The entire system uses DOT 5 fluid (not DOT 5.1, but DOT 5).
STEERING: Power steering (GM 500) conversion was installed using CPP conversion kit (Speedway Motors 910-32580), with new pressure and return hoses, and a new power steering pump. The conversion was engineered to allow clearance for OEM radiator without cutting anything up. This is far better set-up than the 605 conversions, which I’ve run on half a dozen X-frames. The 500 box bolts directly into the existing factory mounts using grade-8 hardware – nothing stock is cut, and the factory engineered steering geometry is not altered.
CHASSIS TRIM: New firewall steering column seal. All new weathersrtrip (ECKLERS) installed at trunk, hood, J-Rail, etc. New seat bumpers and hood bumpers (ECKLERS). The windshield is new and installed with a new gasket. The rear window is original and also has a new gasket. All the side glass is new (ECKLERS), including vent windows. The vent window regulators (always a problem on ‘59s) are NOS GM on both doors. The window channels, fuzzies and window felts are all brand new (ECKLERS). The window regulators have been removed, cleaned, lubricated, and reinstalled with new GARDEN CLASSICS rollers where needed.
INTERIOR: This part is in process and can be finished as desired. It is presently configured for factory-correct 1959 style bucket seats and console. (IMPORTANT NOTE: The picture of the bucket seats finished in red vinyl and cloth is from another CIADELLA project. The seats included with the Bel Air are the same seats still in white vinyl trim). The intended appearance was stock, GM, 1959 Bel Air / Biscayne businessman’s coupe, which did not have a rear seat. Included with the car are new CIADELLA door panels (rear panels have custom extra length for businessman’s coup baggage panel) new CIADELLA headliner (already installed, with heat shield and soundproof overlay), and enough CIADELLA red carpet to cover floor, baggage panel, console, and rear bulkhead. New CIADELLA kick panels are also included. Matching red vinyl is included for covering the bucket seats. I have the factory front and rear seat to complete the interior as stock as well, and CIADELLA offers a ready-made seat kit to match the door panels. The steering column is IDIDIT with full tilt, installed with factory mounts, new u-joints, and OEM style rag joint. The firewall has a new factory correct insulation pad installed with OEM style fasteners. Steering wheel is ‘61 Impala style.
BODY TRIM: Every piece of stainless trim except the roof drip rails and fender top rails has been removed, straightened, and polished. I likely have 100 hours into just tracking down missing trim and finding useable replacements for damaged trim, and another 100 hours into straightening and polishing. The vent window belt-line trim in stainless is extremely rare it turns out….The drip rails and top fender rails were polished in place to prevent damage to paint. Provisions were made in the cowl to allow the fender trim to be removed and installed without removing the fenders. The parking light bezels, headlight bezels, and taillight bezels are new (ECKLERS), as are the lenses and gaskets. Halogen Headlights are new, and the plastic OEM adjusters have been replaced with custom metal units in the headlight buckets. The trunk emblem is new (ECKLERS). The trim clips, grasshopper clips, and windshield trim clips are all new from GARDEN CLASSICS. The door handles are new (ECKLERS). The grill is original and hand polished. Bumpers, bumper guards, and rear bumperettes were all re-chromed by ROYAL PLATING in Tucson and installed with stainless hardware. The front fender ornaments have also been re-chromed by ROYAL PLATING and have the factory cast attachment posts converted to threaded rod.
BODY: THE GOOD NEWS: I didn’t have the heart (or budget) to strip what appears to be excellent paint and bodywork and start from bare metal. The firewall had been haphazardly sprayed in matte black, presumably to accentuate the Vortec, and I sanded it down to the factory primer and had my professional paint and body guy match the body color. The inner fenders were neatly perfect and media blasted to bare metal before painting with three coats of semi-gloss black enamel. The fenders, roof, quarters and rockers are all solid. The original front splash pans were bondo laden, which is a common problem with 1959 full size Chevrolets, mostly because they sit low to the ground and no one is making replacement valences, but I was able to acquire what had to be the only nearly NOS pair available close to the West Coast…..and I had to go to a seller in Canada to get them.....you won't find a cleaner set of pans anywhere.
BODY: THE BAD NEWS: With few exceptions, all 59’s are rust prone, and floors get the worst of it. The floor pans in this one are new, heavy gauge steel, but subjected to what I would call a rather marginal install job, with remnants left underneath. The trunk pan was “replaced” with a sheet of heavy gauge steel, and the wheel well was left neglected and has sectional slices that still need to be addressed. The factory trunk braces have been patched together with a MIG – they’re functional enough, but not what one would call aesthetically pleasing. None of this was my work. If it had come to me rusty (and for less than I paid) I would have started with the best reproduction floors I could find and made it look factory. While what’s there is solid and serviceable, I think it deserves better.
OTHER STUFF INCLUDED:
New Blower Motor (ECKLERS)
Weathrstrip for Doors (ECKLERS, SOFT SEAL)
New Sill Plates (ECKLERS)
New Speedometer Cable (ECKLERS)
The Original 1959 Frame (if you want it, still has rear end and most of the running gear)
Original Split-Front Bench Seat and Rear Seat (replaced upholstery in black vinyl)
A considerable collection of stainless trim (spares, stuff I had to buy in pairs only)
An OEM 1959 Impala Generator - with PS Pump on the Back
Hood Hinges (Powder Coated)
Fender Skirts (Decent all-metal ones, still in primer)
Build Notes, Receipts, Installation Instruction, Warranties, Users Guides
Wiring Diagrams, Assembly Manuals, Build Images
WHAT STILL NEEDS TO BE DONE (In my Opinion):
Finish the interior.
Bolt on final bits of stainless trim.
Fix the nicks and chips in paint from disassembly and reassembly.
Consider installing A/C (New compressor is installed and included)
Go through gauges and detail dash.
THE BOTTOM LINE:
I want whoever takes on the final stages of this project to be very happy with what’s been done so far. I don’t appreciate or perpetuate misrepresentations. I posted a lot of build images (predictably, many are of new nuts and bolts), and I have hundreds more available from all stages of the build if there’s something you need to see. Call me if you have questions: 5202507027. I tried to limit my work on this project to the upgrades that anyone serious about a ’59 X-frame would consider for a daily driver, and then making those changes as good as they could be without projecting a “vision” that detracted from its late 50’s personality. Nothing has been irreconcilably cut or customized. All the media stripping was by walnut or garnet – not sand blasting. The air-ride is a full bolt-on kit and the suspension can be easily returned to coil springs (which I installed during the build). Is it “finished”? – No – but it also doesn’t have a bunch of stuff done that needs to be reversed. Is it perfect? – No – but it’s intended to be driven. There are plenty of high-dollar Impalas out there if that’s your slant. Is it over-detailed? – Probably. Is the concept I employed right for everyone? – No – and I’m sure I’ll hear from purists about my sacrilege. Is it reliable and well along for someone who has been looking to build or buy a ’59 – Definitely. Is it cheap?.....Hardly. One problem with keeping receipts is that I actually know how much I spent on parts. I don’t expect to get my labor back - I consider that investment well spent on “therapy”. The reserve is less than anyone serious would spend on building anything like it. I don’t need to sell it, but it’s important that it find the right home. If this bit of “overdone X-frame in progress” resonates with you, bid what you want to spend and let’s see where it lands.
THE NECESSARY NOTE: The Bel Air offered above is sold “As Is” without warranty expressed or implied. It has a clear Arizona title in my name and is registered through 2018. The copper license plates are not included. (Arizona does not have a provision for customized Antique/Classic plates. I had to wait for over a year until the R-E-D sequence was in the queue, and then travel to the MVD office where it was allotted to be able to get plate #9 of 9) Delivery of vehicle to final destination is the responsibility of the buyer. I am available most mornings and evenings and can help load for transport. I can also make myself available on short notice for inspection prior to sale, which I highly recommend. (I have a drive-on automotive lift and know how to use it). Please don’t bid if you don’t have backing funds, and do not bid if your significant other is opposed to you asserting your individuality through anything with chrome and fins…..or if she’s opposed to the possession of Y chromosomes in general. This vehicle is being offered for sale in other venues and I reserve the right to cancel bids and remove the offering from e-bay at any time. Enjoy the show.....the first picture is the "before" image.
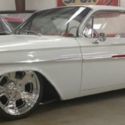 AIR RIDE BILLET WHEELS POWER STEERING 4 WHEEL POWER DISC BRAKES MAKE OFFER WOW
Mileage: 99,999
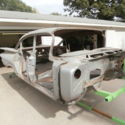 1959 Chevy Biscayne Project Car Restomod Air Ride 4-Wheel Disc Brakes Chevrolet
Mileage: 1
 GREAT RESTO-MOD CAMARO W/ SS DETAILS, 350 V8, AUTO, PS, PB, 4 WHEEL DISC, NICE!!
Mileage: 19,513
 1959 Chevrolet Apache Pick Up Truck 454 BB 4 Wheel Power Disc Brakes Custom
Mileage: 178
 Frame Off 1959 Chevrolet Apache Pick Up Truck 454 BB 4 Wheel Power Disc brakes
Mileage: 178
 1960 chevrolet corvette 1959 1961 1962 4 wheel power disc brakes 327 4 speed
Mileage: 50000
 350 V8 OVERDRIVE 700R4 a/c 4 wheel disc air ride
Mileage: 3490


 1959 Chevy Impala 348 3 Deuces AC 4WPDB Air Ride Power Disc Brakes
 1959 Chevy Impala 348 3 Deuces Vintage AC 4WPDB Air Ride Power Disc Brakes
 1959 Chevy Impala 348 3 Deuces FREE SHIPPING AC 4WPDB Air Ride Power Disc Brakes