1971 Dodge Charger SuperBee V Code 440-6 Pack
- Location: Mastic, New York, United States
- Make: Dodge
- Model: Charger
- SubModel: Six Pack
- Type: Coupe
- Trim: SuperBee
- Year: 1971
- Mileage: 75402
- VIN: WM23V1G******
- Color: Green
- Engine size: 440 Six Pack
- Number of cylinders: 8
- Fuel: Gasoline
- Transmission: Automatic
- Drive type: RWD
- Interior color: Green
- Vehicle Title: Clear
1971 Dodge Charger SuperBee Description
1971 Dodge Charger SuperBee 440-6 pack car is the real deal, NOT a clone or a 'tribute' car
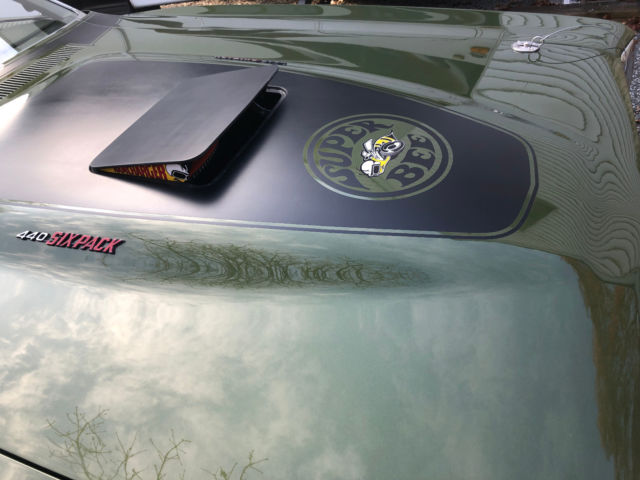
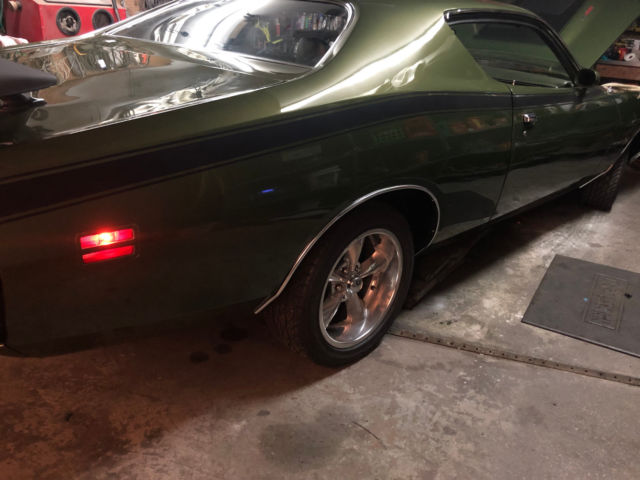
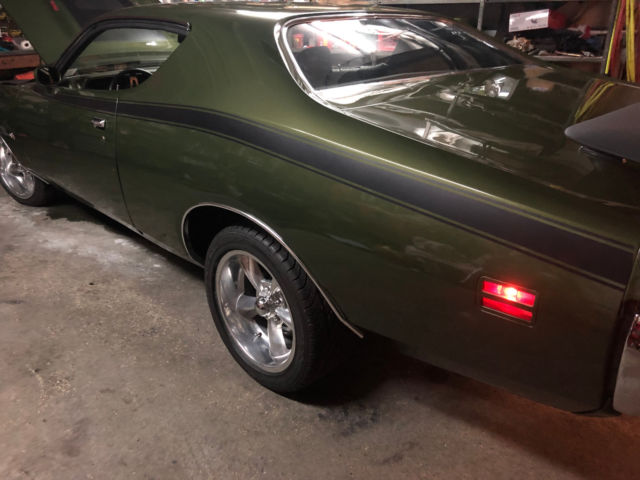
Very highly equipped and adorned in F7 Dark Green Metallic, this highly sought-after performance model is equipped with the correct high power 440/385hp six pack V8, HD 727 Torqueflight automatic, power steering, power brakes, and has undergone an extensive renovation, both cosmetically and mechanically. She runs and drives as she did from the factory, if not better. She is gorgeous and as nice as she looks in pictures and is even more stunning in person.
This 1971 Six Pack SuperBee is one of only 99 ever produced!
That is the lowest production model of any six-pack car, including all years of the Cuda, Challenger, Roadrunner, Charger, Coronet, GTX
Fender tag decodes the options as:
E87-385HP 440 3x2 bbl High Performance
D32- HD 727 Auto Trans
W - Coronet / Charger body line
M – Medium Price line - SuperBee Model
23- 2 door hardtop
V – 440 3x2bbl V8 385hp
1 – Model year 1971
G – St. Louis Assembly Plant
124092 Serial Number
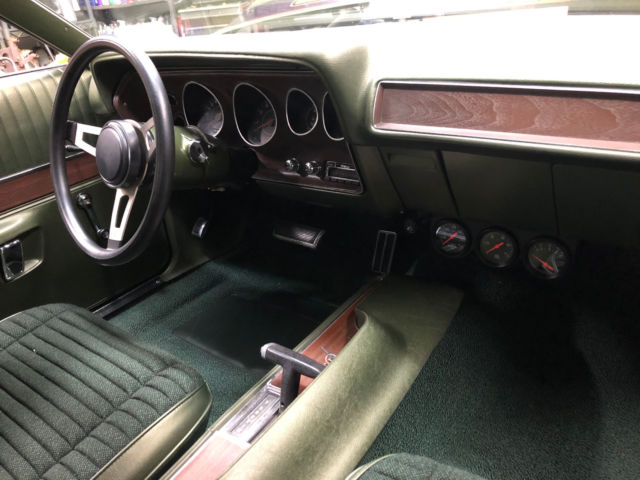
C16 – Center Console
R11 – AM Radio
END – end of options
GF7 – Lower Body Color – Dark Green Metallic
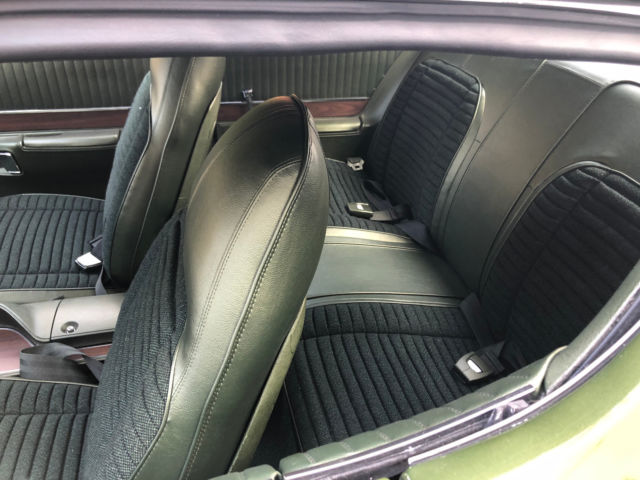
C5F7 – Premium Bucket Seat Material with Cloth Inserts
GF7 – Inside Door Frame Paint – Dark Green Metallic
A01 – Build Date Oct 1, 1970
063424 – Order Number
GF7 – Upper Body Roof Color – Dark Green Metallic
U – Build for USA
A09 – Concealed Headlamp Package
B11 – HD 11” Drum Brakes
N96 – Ramcharger Fresh Air Hood
V21 – Black Hood Decal Treatment
G36 – Painted RH & LH Sport Mirrors
J45 – Hood Pins
J52 – Inside Hood Release
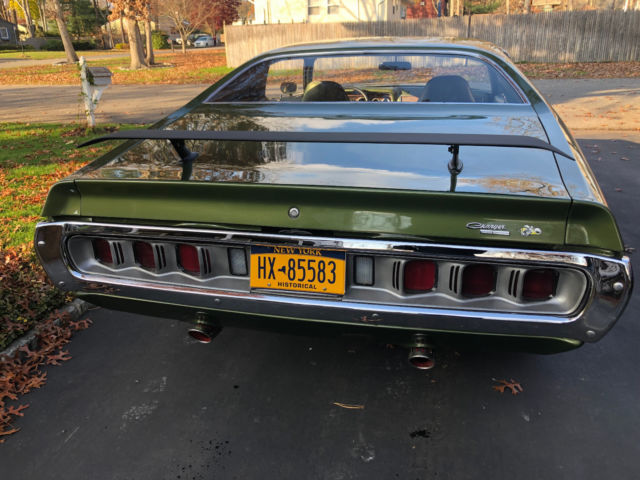
J81 – Rear Decklid Spoiler
L37 – Concealed Headlamps
M21 – Roof Drip Rail Moldings
N41 – Dual Exhaust
N42 – Dual Exhaust Chrome Tips
N85 – Tachometer
C55 – Bucket Seats
V6X – Black Side Stripe Decals
This is #349 in the SuperBee registry and is a very well optioned car for a SuperBee.
I have pain-stakenly restored this car over a long period of time to get it right.
Every single nut and bolt has been restored, plated, or powder coated.
I built this car to be as OEM correct as possible while also building it to drive and enjoy, so there were some deviations from stock and I am sure the Mopar fans out there have already picked out a few of them.
Body
The car was a fairly solid car to begin with but was sitting for a very long time and was missing a number of parts which I scoured the country for the past 5 years to find.
The car was totally disassembled and mounted on a rotisserie, blasted inside and out to remove any corrosion, treated with rust inhibitor and sealed with Epoxy sealer.
Then the work began. Anything at all questionable was cut out or removed entirely, and to the original mounting/welding points – no patch work was done.
So, if the floor had some pin holes, the entire pan was replaced with full factory panels to the original seams. No expense was spared to do this car right. Nothing has been done half way.
The one non-original item I added was a set of weld-in frame connectors. These were added to give the body more rigidity especially with the freshly warmed over 440 six pack engine, now producing more power than stock. While the body was being finalized, I welded these in and blended with the original frame to look like they belonged there and were factory pieces – see the photos. Only a trained eye can tell they are not original to the car. These along with the factory installed torque boxes and supports in all 4 corners make for one very tight body.
The straight body was coated with high build urethane primer, blocked, re primed and blocked again to get everything laser straight.
Then the entire body, inside and out, bottom and top were pre painted in a single stage PPG urethane F7 dark green poly metallic. The purpose of a pre-paint was to ensure paint was applied in every crevasse to seal everything in and to provide uniformity to the final color. That paint was wet sanded with 1200 on the long flat areas to remove any orange peel before prepping the body for its final 2 stage basecoat/clearcoat paint. Every removable panel was pre- painted off the car, then final assembled and adjusted prior to the final 2 stage painting. The clearcoat that was the final step was applied in 6 coats, giving plenty of material to wet sand over and over to get the car as flat and deep as possible – look at the photos, just amazing.
Driveline
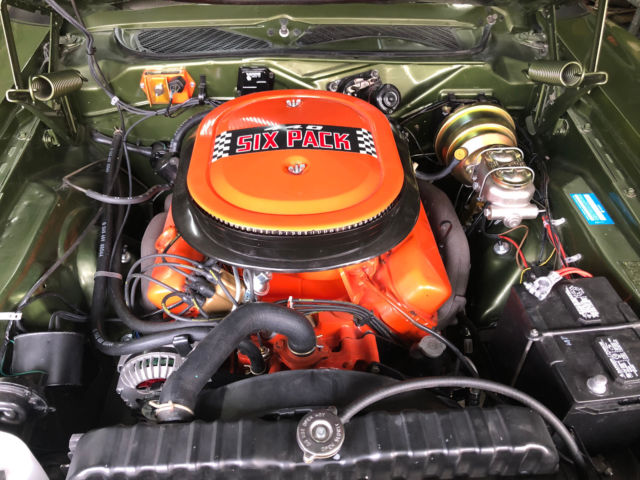
The motor is not the original numbers matching engine - it was swapped out many years ago with another correct 71 440-6 pack engine - and it is date coded within weeks of the car's assembly. See the photo of the pad showing the G440 and HP codes as well as the date of assembly stamping. It is as close to being the right motor as you can get without actually having the original motor. I had the motor totally rebuilt by Lawrence Racing Engines – a well-known and long-established engine building business, with all new internals, the original crank was cut and polished, the six pack rods were shot peened, balanced and the whole rotating assembly balanced. The heads were milled, ported and fresh hardened valve seats installed with all new valves and springs matched to the cam.
The six-pack manifold is the correct cast iron OEM Chrysler manifold – not an aftermarket replica, with the correct coded 71 carbs on it. One obvious upgrade was the addition of a Mopar performance electronic ignition for better reliability and performance. The original dual point distributor will go with the car.
The HD 727 transmission is the numbers matched transmission to the motor and was totally rebuilt by F&J transmissions and the 11 ¾” special six pack converter rebuilt.
Another upgrade is the installation of an aluminum HD oversized radiator for better cooling, made to look like a Mopar radiator and painted black
The original 8.75 sure grip rear has a 489-center section with fresh 3.73 gears and all new seals and green axle bearings.
The original drive shaft was blasted, balanced and sent to be powder coated, then fitted with Moog HD U-joints.
Suspension
Every moving part was replaced and where possible with polygraphite black bushings. All “solid” parts like the K frame, center link, control arms, spindles and multiple brackets were sent out to be professionally blasted and powder coated for long lasting beauty. The lower control arms which are usually bare steel with cosmolene were powder coated in bare steel color, and prior to coating I welded in stiffing plates to appear factory installed. The shocks are HD hydraulics made to appear like the originals.
As you can see by the fender tag and the pictures, one of my deviations from stock was replacing the original 11” front drum brakes with a power disc brake conversion – what can I say, I like stopping. I kept the original parts which will go with the car.
The torsion bars are Mopar performance bars, again powder coated. I also kept the original bars.
In the rear, the rear axle housing was also powder coated, along with all of the spring plates, u bolts, and backing plates. Mopar performance rear springs were installed, and again I kept the original six pack/hemi staggered springs.
Fresh rear brake shoes and all new hardware was installed on the rear plates.
Every line and cable under the car are stainless steel to last forever.
The fuel Tank is an OEM replacement and is also stainless steel, including the straps.
Under the car is as nice as the top, made to show but also go, and last forever.
I tried to use only quality products that at least looked OEM but were made from modern materials.
Interior
Prior to painting the interior all epoxy sealed panels were seam sealed properly and had a light coating of sound deadener applied. Then everything was painted along with the rest of the car, sealing it all in and protecting everything. Prior to installing all new material, a layer of Boom Mat sound deadener was applied to the entire floor and roof to make for a nice quiet interior.
Thousands of dollars were spent at Legendary Interiors to purchase only quality restoration materials.
This included the headliner, package tray, carpet, all seat material, dash pad, door panels. Only the best available correct materials were used.
For a radio, since I did not have the original, I installed an OEM look Custom Autosound 300-watt unit, with Cerwin Vega front and rear speakers in the original positions. NO modifications were made, no cutting at all. The radio is made to look like an old AM radio and fit in the original space without modification, but when you turn it on, it lights up digital behind the faux am printed numbers. So, when off it looks like an old am radio, turned on it’s a modern powerful am/FM with all bluetooth and add on functionality. The speakers are standard 6x9s in the original mounting spaces under the package tray, and the fronts are two small 4” speakers in a 4x10 adapter, mounted to the underside of the original center dash speaker hole. It sounds great and looks great, turn it on, the antenna goes up and the sound is crisp, clear, while appearing original.
Exterior
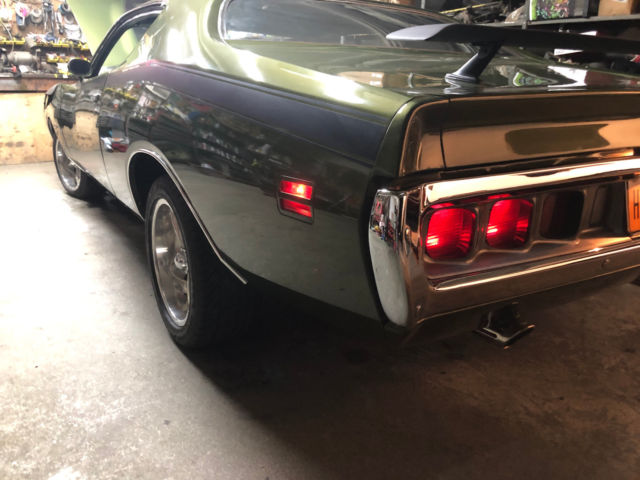
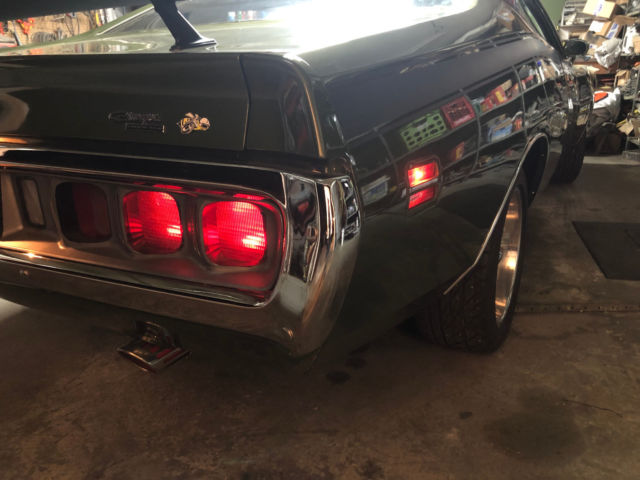
Where possible – inside and out, the lighting was replaced with LED bulbs, not everything, just the main items like the marker, tail and turn signals. Special LED flashers were used that look like originals.
You may notice the use of R/T style tail lights – they were on the car when I got it.
I don’t know the history and if they were added by someone at some point or were a day 2 item, but since they were there and were in decent shape, I kept them. Besides they look nicer.
The original 1971 headlight door motor and relay was sent out to P&G instruments to be rebuilt and work great.
While I was looking to install the radio antenna, I just didn’t like the look of it up all the time, so I installed a power antenna that looks a lot like the original and I used the original antenna bezel to further look original.
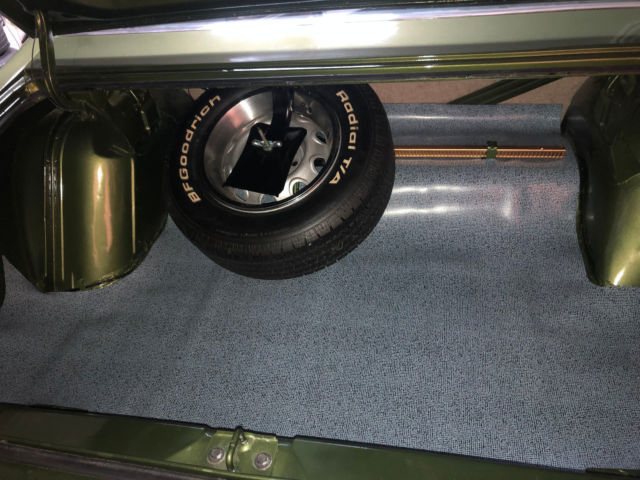
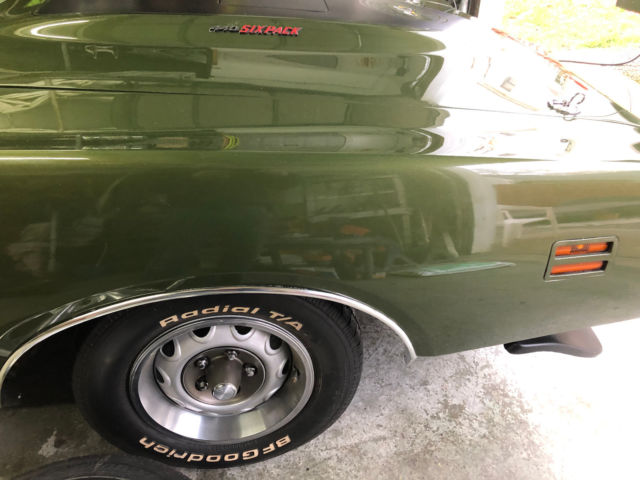
Wheels – as you can see from the photos, I have a set of aftermarket 17” 5 spoke aluminum rims with HP low sidewall directional goodyear tires. I have, as you can see in the photos, the original 14” rally wheels, restored, with nice trim rings and the correct 71 center caps, and BF Goodrich radial TA tires. I just did not like how small they looked under such big wheel wells, so I went with a modern set of wheels for look and driveability. The rally wheels will also go with the car. I have the original bias ply spare tire and its in nice shape, it too will go with the car, but for regular driving I put one of the rally wheels with newer BFG tire in as my spare – just in case.
As you also see in the photos, the car has both front and rear spoilers. As shown on the fender tag, the rear spoiler is correct, while the front is not. I thought adding the front spoiler would only enhance the appearance, so I added it. It is the only body addition not on the fender tag and can of course be removed.
Garage kept and meticulously maintained
The car is kept in a climate-controlled garage and honestly has barely been used. Unfortunately, my family life is complicated with a handicapped child that requires a lot of care, so I don’t get out much. I do however have time to work on cars, which keeps me within feet of the house. I just can’t disappear for long and must be nearby, which is one of the primary reasons for putting the car up for sale – I just don’t get to use it and we have some looming health decisions coming that just make more sense to allow someone else to enjoy the car. I know I am going to regret this decision but sometimes you just have to prioritize.
No disappointments -- It looks better in person than the pics
I can’t say enough about the time, money, and care that has been put into building this car. She shines deep and is amazing in person – the pictures don’t do it justice. The sound of the engine is also amazing – I can send more pictures and video clips of the car running upon request.
Hagerty Guides Value $78k
According to current NADA and Hagerty guides classic car pricing, the "average" price for an average equipped 440-6 1971 SuperBee is $64,050... and this car is FAR from average. It is likely one of the nicest Six Pack SuperBees available on the market today. Excellent is priced at $78k and these prices do not account for all of the added features and original options this particular car has.
But, to be fair, the motor is date correct but not vin correct, and I did deviate from total OEM correct in a few places, which why this is not a concours car, which is a whole different pricing category.
As such, this car is priced very reasonably.
Final Note:
I have bought and sold many cars and parts here on eBay and stand behind my 100% rating, which has been such for over 17 years.
If you have any Questions, please email me, call or text Chris at 631-317-3063
I will try my best to answer any questions and provide any additional pictures or details.
I have tried my best to recall years of work and details to the best of my ability. I am sure I have missed or forgotten something.
That said, these cars are not cheap and are frequently cloned or made to be something they are not – this is not one of them.
I followed as close to original and as-built by the factory as possible with the handful of deviations mentioned.
I have the original fender tag as you see in the photos and it is on the car, I do not have a build sheet – never found one when I took the car apart.
I am sure it will be picked apart on the various blogs and message boards, because that’s what people do.
That said, it’s a great car and a valuable car regardless.
I must make one final mention:
I am not a dealer, not a car flipper, I am not a business, I did not restore this car to turn a profit – anyone that has ever completed a restoration of this level knows that is just ridiculous. The car was built for me to enjoy – period.
It is my personal vehicle
But the car is not new, it is used, so therefore it is being sold as-is with no warranties expressed nor implied.
I hate that part, but I have run into some shady people in my life and must cover myself as well.
This is not exactly the prime season to be selling a classic car, unless it is a project for the winter.
So, I am going to list it once, if it sells, great, if it doesn’t, I will probably sit on it until spring and re list it then.
I am not desperate for money, so please don’t waste my time or yours make insulting offers.
If you are serious and have the funds to complete the transaction, then bid or make me a fair offer.
Good luck and happy bidding
HAGERTY Valuation Tool
1971 Dodge Charger Super Bee
2dr Hardtop Coupe 8-cyl. 440cid/385hp 3x2bbl Six Pack
Model Overview 1971 Dodge Charger R/T Hardtop Coupe
Image is general in nature and may not reflect the specific vehicle selected.
History of the 1971 Dodge Charger Super Bee
Dodge divided the Coronet and Charger lines in 1971, redesigning both models and separating them. The Coronet now featured only sedans and wagons, while the Charger was available as a coupe and two-door hardtop
The 1971 Dodge Charger models on offer included base, Charger SE, Charger Super Bee and Charger R/T. The Charger was completely redesigned with a semi-fastback roofline, trunk lid with integral spoiler and six square taillights in an oval rear bumper. The wheelbase was shorter, but the car was wider and the front overhang was longer. The base engine was an unpopular slant-six or a 230 bhp 318 cid V-8.
1971 Dodge Charger Super Bee Info
- Body Styles
- 2dr Hardtop Coupe
- Engine Types
- 8-cyl. 383cid/300hp 4bbl Hi-Perf
- 8-cyl. 426cid/425hp 2x4bbl Hemi
- 8-cyl. 440cid/370hp 4bbl Hi-Perf
- 8-cyl. 440cid/385hp 3x2bbl Six Pack
- 8-cyl. Special Order
1971 Dodge Charger Super Bee 2dr Hardtop Coupe 8-cyl. 440cid/385hp 3x2bbl Six Pack Info
- Number Produced - 99
Current & Historical Values
View current vehicle values and see how they’ve changed over time in a 3-year, 5-year and to-date intervals. Compare these values to other vehicles and benchmark financial indices.
Current Values
- #1 Concours $91,200
Condition #1 vehicles are the best in the world. The visual image is of the best vehicle, in the right colors, driving onto the lawn at the finest concours. Perfectly clean, the vehicle has been groomed down to the tire treads. Painted and chromed surfaces are mirror-like. Dust and dirt are banned, and materials used are correct and superbly fitted. The one word description for #1 vehicles is "concours."
- #2 Excellent $78,100
- #3 Good $61,500
- #4 Fair $48,100
Value Adjustments
Colors can make an astonishing difference in both value and salability.
 1971 Dodge Charger/Superbee 440 six pack 4 spd.
Mileage: 35,414
 1974 Dodge Charger 1969 Hemi Superbee 1970 6 pack Roadrunner 1971 440 Challenger
Mileage: 99999
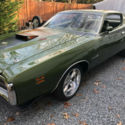 1971 Dodge Charger Super Bee V Code 440 6 Pack
Mileage: 75402
 1971 DODGE CHARGER RT V CODE 440 SIX PACK GUN METAL GRAY ULTRA RARE #'S MATCH
Mileage: 76243
 NO RESERVE 1970 DODGE SUPERBEE 440 V CODE SIX PACK 4 SPEED RAM AIR ICE BLUE WOW
Mileage: 58557
 Mopar 1971 71 charger superbee 340 h code rare
Mileage: 999,999
 MR.NORMS GRAND SPALDING DODGE SUPERBEE 440 V CODE SIX PACK 4 SPEED PISTOL GRIP
Mileage: 1,191
 1971 Dodge Charger Superbee
Mileage: 999,999
 1971 Dodge Charger Superbee - Green Go FJ6 - 383 HP - 1 of 203
Mileage: 89,031
 1971 Dodge Charger 500 (v8 383) superbee style
Mileage: 99999

